 how-to
Best Lighting for Moody Artist Portraits
Table of Contents
- Why Moody Artist Portraits Depend on Light Direction
- The One-Light Portrait Setup: Maximum Drama, Minimum Gear
- Portrait Lighting Patterns That Build Mood
- Moody Portrait Photography with Natural Light
- Colored Lighting for Portraits: Gels, Temperature, and Contrast
- Exposure Starting Points for Low-Key Portraits
- Troubleshooting Common Moody Lighting Problems
- Conclusion
- Frequently Asked Questions
Last Updated: October 12, 2026
Why Moody Artist Portraits Depend on Light Direction
The best lighting for moody artist portraits starts with one decision: where you place the light.
At James DeSalvo Photography, we shoot musicians and performers, and the difference between a flat frame and a striking one is rarely the gear.
Light direction shapes the face, sets the emotional temperature, and separates subject from background. Move a light two feet and the mood changes.
How Shadow Placement Creates Depth
Depth comes from the ratio between lit and unlit areas. A face lit evenly reads flat; one side in shadow reads three-dimensional. Where the shadow falls decides whether the portrait feels gentle or severe.
Light Source Size: Soft vs. Hard
Soft light comes from a large source close to the subject and produces gradual shadow edges. Hard light comes from a small or distant source and produces sharp edges and strong contrast. For moody work, hard light is often the better start, it gives you clean shadows you can place on purpose.
The One-Light Portrait Setup: Maximum Drama, Minimum Gear
A one-light portrait setup is a single light source shaping the subject, with no fill. It's the fastest route to a dramatic frame and forces you to solve problems with position instead of wattage.
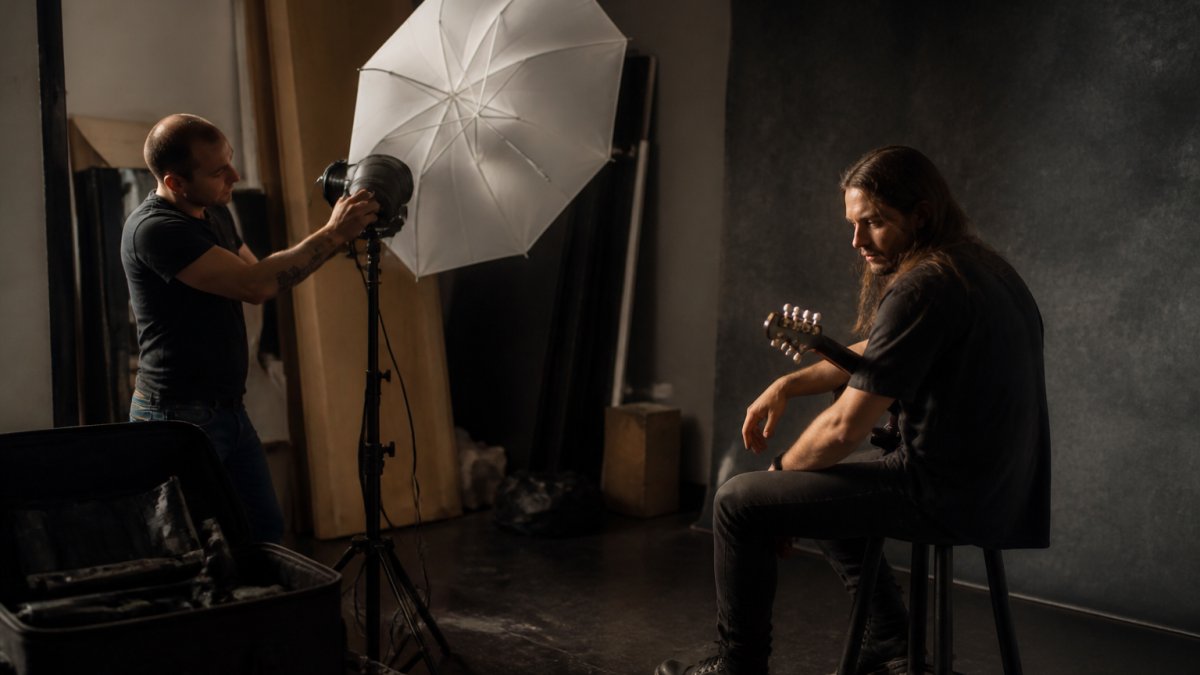
Positioning the Key Light at 45 Degrees
The key light is your main light. Place it roughly 45 degrees to one side and slightly above eye level, giving you a lit side and a shadow side, the shadow side is where the mood lives. Move it higher for deeper eye shadows, further to the side for more contrast.
Controlling Light Spill with Grids and Flags
Spill is stray light landing where you don't want it, flattening the frame and lifting shadows. A grid narrows the beam so light hits only your subject; a flag blocks light from the background. A reflector bounces light back in for a touch of fill, use it sparingly.
Portrait Lighting Patterns That Build Mood
Portrait lighting patterns are named arrangements of light and shadow on the face, each producing a different emotional read. Three do most of the heavy lifting:
| Pattern | Light Position | Shadow Signature | Mood |
|---|---|---|---|
| Rembrandt | 45 degrees, above eye level | Small triangle of light on the shadow cheek | Serious, classic |
| Split | 90 degrees to the side | Half the face in shadow | Severe, graphic |
| Loop | 30-45 degrees, slightly above | Small shadow under the nose | Softer, still dimensional |
Rembrandt and split lighting carry the most weight for artist portraits; loop is the gentler option when you want shape without harshness.
Rembrandt Lighting for Artist Portraits
Rembrandt lighting places a small triangle of light on the cheek below the eye on the shadow side, leaving the rest of that side dark. The triangle gives the eye somewhere to land while the shadow does the emotional work.
To build it:
- Place your key light about 45 degrees to one side
- Raise it until the shadow from the nose meets the shadow from the cheek
- Check that the triangle stays small and clean
- Keep the fill off, or use negative fill to deepen the shadow
Negative fill means placing something black on the shadow side to absorb bounced light, the cheapest way to add drama.
Moody Portrait Photography with Natural Light
Moody portrait photography with natural light is possible without a single strobe. Treat "natural light" as distinct setups you build on purpose: the best natural light for moody work is directional and low, window light from one side, or late afternoon sun raking across a face.
Setup 1: The Painterly Window Portrait
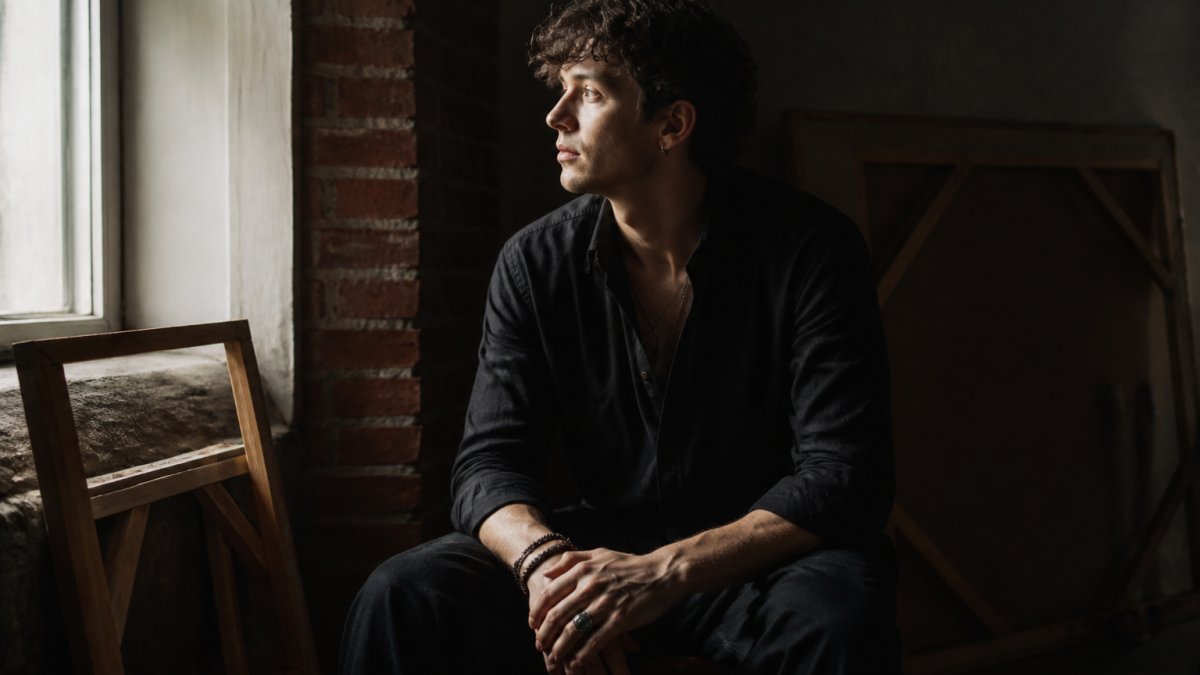
The closest natural-light equivalent to a Rembrandt studio setup, it suits singer-songwriters, classical players, and anyone whose image leans on craft.
- Light source: A single window, ideally north-facing, with the rest of the room dark or curtained.
- Subject distance: Roughly 3 to 5 feet from the window, angled so the light crosses the face at about 45 degrees.
- Background: A dark wall, a heavy curtain, or a corner that falls off into shadow.
The result reads like an oil study: soft shadow transitions, a single pool of light on the face, and a background that disappears.
Setup 2: The Cinematic Doorway
The setup for artists whose music has a narrative or filmic quality, indie bands, producers, anyone with a cinematic reference.
- Light source: A doorway or narrow window that acts as a soft, directional slot of light.
- Subject position: Standing or seated just inside the frame of the door, with the light hitting one side of the face and the rest of the body falling into shadow.
- Background: The dark interior behind them, not the bright exterior.
The doorway setup is one of the most reliable ways to get a moody frame with no gear, because the architecture does the flagging for you.
Setup 3: The Chiaroscuro Backlight
The most dramatic natural-light option and the closest to classic chiaroscuro painting, it works best for performers with strong silhouettes, dancers, horn players, anyone whose posture reads in outline.
- Light source: Late afternoon sun, low in the sky, positioned behind and slightly to one side of the subject.
- Subject position: Turned so the sun rims the hair, shoulder, or instrument, with the face mostly in shadow.
- Fill: None, or a tiny white card held just below the chin to keep the eyes readable.
The result is a portrait defined by a line of light rather than a lit face, the natural-light version of split lighting.
Setup 4: The Overcast Sculpt
Overcast light is often dismissed as flat, but it can be shaped into a moody portrait if you control what it bounces off.
- Light source: Open sky, but the subject is placed under an overhang, in a doorway, or beside a dark wall so the light only reaches one side.
- Subject position: Close to the dark surface on the shadow side, so the wall absorbs bounce instead of reflecting it.
- Exposure starting point: ISO 400, f/2.8, 1/250s. Watch the histogram, overcast light clips highlights quietly.
What to Avoid in Every Natural-Light Setup
- Open shade on a bright day. It wraps light around the whole face and kills the contrast you're after.
- Bright walls behind the subject. They bounce light back into the shadow side and flatten the frame. Move the subject forward and the mood returns.
- Auto white balance. Mixed daylight and tungsten will drift. Set white balance for the dominant source and leave it.
If you want to see how working photographers approach this, the Digital Photography School guide to moody portraits in natural light walks through a natural-light approach.
Colored Lighting for Portraits: Gels, Temperature, and Contrast
Colored lighting for portraits works best when the color is doing a job. A gel on a fill light separates a subject from a dark background without lifting overall exposure; a gel on a background light adds depth without touching the face. The difference between a colored portrait that reads as moody and one that reads as a party photo is almost always the color pairing and the balance between sources.
The Three Jobs a Gel Can Do
Before you pick a color, decide which of these three jobs the gel is doing:
- Separation. A cool gel on a background light pushes the subject forward without brightening the frame. This is the safest use of color in moody work.
- Fill with attitude. A gel on a fill light adds a second color to the shadow side, giving the shadow information without lifting it to grey.
- Key with character. A gel on the key light changes the emotional temperature of the whole portrait, warm for intimacy, cool for distance, green or magenta for unease.
One gel per job. If two gels are doing the same job, one of them is decoration.
Color Pairings That Read as Moody
Color contrast is what makes a gel read. These pairings create tension without a color clash.
| Key Light | Fill or Background | Effect |
|---|---|---|
| Warm tungsten (3200K) | Cool blue (CTB) | Classic cinematic tension, warm face against cold shadow |
| Neutral daylight (5600K) | Deep blue or teal | Noir, nightclub, late-night studio |
| Warm amber | Magenta or pink | Editorial, fashion-adjacent, softer mood |
| Cool white | Deep red or orange | Stage-light feel, dramatic and theatrical |
| Green (rare, use sparingly) | Warm tungsten | Unease, horror-adjacent, experimental |
The safest starting point for a moody artist portrait is a warm key with a cool fill or background, the pairing most viewers already associate with cinematic lighting, so it reads as intentional.
Color Temperature, White Balance, and the Kelvin Trap
Color temperature is measured in Kelvin: warmer light sits lower (around 3200K for tungsten), cooler light higher (around 5600K for daylight). White balance should be set deliberately when you mix sources, auto with a tungsten key and blue fill will neutralize one of them, collapsing the contrast. Set white balance for the key light and let the fill read as its true color.
Gels on Flash vs. Continuous Light
Gels behave differently by source:
- On flash or strobe: Gels are cut from sheets and taped or clipped to the modifier. Output is consistent, but you can't see the color until you fire, test with a single frame.
- On continuous LED: Gels can be physical or built in. Many LED panels have adjustable color temperature and RGB modes, which eases pairing but can introduce color shift at low output. Check the color at the output level you'll actually use.
- On tungsten: Gels are the only way to change color, and tungsten runs hot, so keep gels off the bulb and use a holder.
A Reproducible Three-Light Color Setup
The Westcott U studio breakdown of creating moody portraits with studio lighting demonstrates a structure worth copying even if you only own one light today.
Three lights, three jobs. The order of investment:
- Key light with a large modifier. This does most of the work. Get this right before adding color.
- Background light with a gel. This is the cheapest way to add color contrast without touching the face.
- Fill light with a gel. This is the last addition, and the one most likely to flatten the frame if it's too strong.
A few practical notes on color:
- Saturation matters more than hue for mood. A desaturated blue reads as shadow; a saturated blue reads as a light source.
- Distance controls how much color lands on the subject. Move the gelled light further away and the color becomes a suggestion rather than a statement.
Mixing a cool fill with a warm key is one of the most reliable ways to make a portrait feel cinematic rather than lit. But the color should always serve the shadow, if the gel is brighter than the key, the mood is gone.
Exposure Starting Points for Low-Key Portraits
Low-key lighting means most of the frame sits in shadow, with a small area of light on the subject, the technical foundation of moody work. Exposure is about protecting highlights, not lifting shadows: if the lit side of the face clips, you've lost it.
Starting points to test and adjust:
- Aperture: f/2.8 to f/4 for a soft background, f/5.6 to f/8 for a sharper face
- Shutter speed: 1/125s to 1/200s when using flash, to stay under sync speed
- ISO: 100 to 400 in studio, higher only if you're working with continuous light
With continuous LED lights, the same logic applies but you control output with the dimmer instead of flash power. When comparing LED options, CRI and actual output matter more than the marketing copy, as this guide to continuous LED lights for portrait studios points out.
A light meter helps, but your histogram is enough. Check that the highlights aren't stacked against the right edge.
Troubleshooting Common Moody Lighting Problems
Most moody lighting problems come down to stray light. Diagnose the usual suspects:
| Problem | Likely Cause | Fix |
|---|---|---|
| Background too bright | Spill from the key light | Move subject forward, add a flag or grid |
| Shadows look muddy | Too much bounced fill | Add negative fill on the shadow side |
| Face looks flat | Light too close to camera axis | Move the key light further to the side |
| Harsh blown highlights | Light too close or too powerful | Increase distance, lower power, add diffusion |
| Color looks off | Mixed color temperatures | Set white balance for the key light |
| Eyes lost in shadow | Key light too high | Lower the light until catchlights return |
Work through the list in order, fixing the biggest problem first, then re-check. Skin tones and textures respond differently to hard light: reflective skin can produce hot spots under a bare source, and heavily textured subjects show every shadow edge, diffusion and distance are your tools.
Conclusion
Getting moody artist portraits right comes down to one habit: controlling where the light lands and where it doesn't. That takes practice, and a photographer who understands how a performer wants to be seen.
If you're a musician, band, manager, or label looking for portraits with real atmosphere, James DeSalvo Photography works with artists across the music industry. We also help newer acts with practical guidance on venues to play.
Get started with James DeSalvo Photography and build a portrait set that matches the mood of your music.
Frequently Asked Questions
What is the best type of lighting for moody artist portraits?
There is no single best type, but strobes and continuous LEDs give you the most control for repeatable moody results. A one-light portrait setup with a large modifier and a grid or flag to control spill creates the dramatic shadows that define the style. Natural light works too if you position your subject near a window with the light falling from one side and the background kept dark. The key is direction and shadow control, not the specific fixture.
Can you create moody portrait photography with natural light?
Yes. Position your subject beside a window so light strikes from one side at roughly 45 degrees. Turn off overhead lights and pull the subject away from the wall to let the background fall into shadow. Overcast days give softer, more gradual transitions, while direct sun through a sheer curtain creates harder, more dramatic shadows. North-facing windows provide consistent directional light throughout the day, which makes them useful for moody portrait photography with natural light.
How do colored lights affect the mood of an artist portrait?
Colored lighting for portraits shifts emotional tone faster than almost any other adjustment. A vivid blue fill light against a warm key creates tension and depth. Amber or orange gels suggest warmth and nostalgia, while green or teal reads as uneasy or cinematic. Color temperature mismatches between your key and fill also add mood. Use gels on a strobe or adjust the color mode on an LED panel, then set white balance to taste rather than neutralizing the color.
Where should the key light be placed for a dramatic portrait?
Place the key light about 45 degrees to one side of your subject and slightly above eye level, angled down toward the face. This position creates a shadow on the opposite cheek and under the nose, which builds the contrast that moody artist portraits rely on. Raising the light increases the shadow length under the brow and nose. Moving it closer to the subject makes the light softer; pulling it back makes shadows harder and more defined.